


Developing and Deploying React Apps using AWS Amplify


As a React Developer, you might have studied about Serverless Architecture and how they are being used to dynamically manage memory and resources allocation allowing rapid scaling of Services. With this functionality, you can entirely keep your focus on developing Features and fixing Bugs in your Application while leaving the entire focus of scaling up and upgrading your Servers, to the Cloud Service Provider that you are using.
The advantages of using Serverless Architecture of developing and deploying your applications are many: You will have increased functionality in your Code and you will be able to cut down the Development and Operational Costs by a huge margin. Taking a look at the various Cloud Service Providers, Amazon Web Services (AWS) provides Amplify that makes it easy for you to develop and deploy Serverless Applications on AWS Resources and deploy them.
In this article, we will be taking a look at how you can develop and deploy a React Application by making use of AWS Amplify and setup a CI/CD Pipeline that would allow you, as a Developer, to continuously push the Code to your Project and deploy it automatically on AWS Resources.
We will be taking a look at these parts while developing and deploying a React Application using AWS Amplify:
- What is AWS Amplify?
- Setting a React Project
- Configuring AWS Amplify
- Building an Authentication Module
- Running our Application
- Deploying our Application
What is AWS Amplify?
Have you ever used Firebase? Well, AWS Amplify is a similar concept but it runs on Amazon Web Services and makes use of its resources for the development and deployment of applications. If you are familiar with AWS Toolings, it would be real easy for you to setup Amplify for your Development needs.
For a high-level understanding, AWS Amplify is an abstraction over some of the popular AWS Services like DyanmoDB, Cognito, AppSync, Lambda, S3 and more. With all these at your disposal, Amplify can serve as your Single Point of Contact with all the AWS Resources, with a special emphasis on reducing the Developer Work-Load.
The best part about having AWS Amplify is the customizable plugins that would allow you to modify them or create your own plugin for the purpose. In the next section, we will talk further about setting up AWS Amplify in your React (Javascript) Project and adding AWS Services for User Authentication (Sign-Up/Log-In).

Setting a React Project
React is a Javascript library developed by Facebook, which allows you to create attractive User-Interfaces. It is currently one of the most influential and popular Javascript Libraries with some of its features like Virtual DOM and Component-based Architecture quite well received.
I expect that you have already installed NodeJS and NPM prior to following this step. If not, you can download the Latest Stable Release for NodeJS and verify if it has been installed properly or not:
$ node --version
$ npm --version
Once you have the Versions checked and verified, move onto the next command: create-react-app. You don't need to worry about the complexity of the React as a whole. This Package will take care of that!
$ npm install -g create-react-app
You can alternatively use Yarn here, but in this article, we will use npm for adding and managing Packages. Next, let's create the "React-Amplify-Auth" Application provided by Create-React-App Template, by pushing in the command:
$ create-react-app React-Amplify-Auth
Your React Application would now be initialized and you can push in the Command: npm start to kick-start your React Application on the Development Server. Once we have configured that, we will move on the next steps of configuring AWS Amplify in our Project.

Configuring AWS Amplify
We will now configure AWS Amplify as part of our Project. We will kickstart Amplify by first installing it globally using NPM:
$ npm install -g @aws-amplify/cli
After the Amplify CLI is installed, you have now a singular CLI tool through which you can manage and configure AWS Resources according to your demand. Let us know configure our Amplify by pushing in the Command:
$ amplify configure
While this Command is running, you need to make sure that you already have an AWS Account and are presently logged into the AWS Console. In this step, you will be basically specifying the AWS Region and the IAM Username. The IAM User will be basically the stand-alone user that would allow you to interact with the AWS Resources you are making use of. You will be given a Name and Credentials for the same and you can possibly make use of them to specify resources.
The Command would first kick-start your AWS Console and once you press Enter you will be redirected to specifying the Region and your Username. Once you have done that, you will be directed to a new tab in your browser where you have to basically add the User manually.
$ amplify configure

Follow these steps to set up access to your AWS account:

Sign in to your AWS administrator account:
https://console.aws.amazon.com/
Press Enter to continue
(node:10492) ExperimentalWarning: The fs.promises API is experimental

Specify the AWS Region
? region:  us-east-1
Specify the username of the new IAM user:
? user name:  harsh_casper
Complete the user creation using the AWS console
https://console.aws.amazon.com/iam/home?region=us-east-1#/users$new?step=final&accessKey&userNames=harsh_casper&permissionType=policies&policies=arn:aws:iam::aws:policy%2FAdministratorAccess
Press Enter to continue
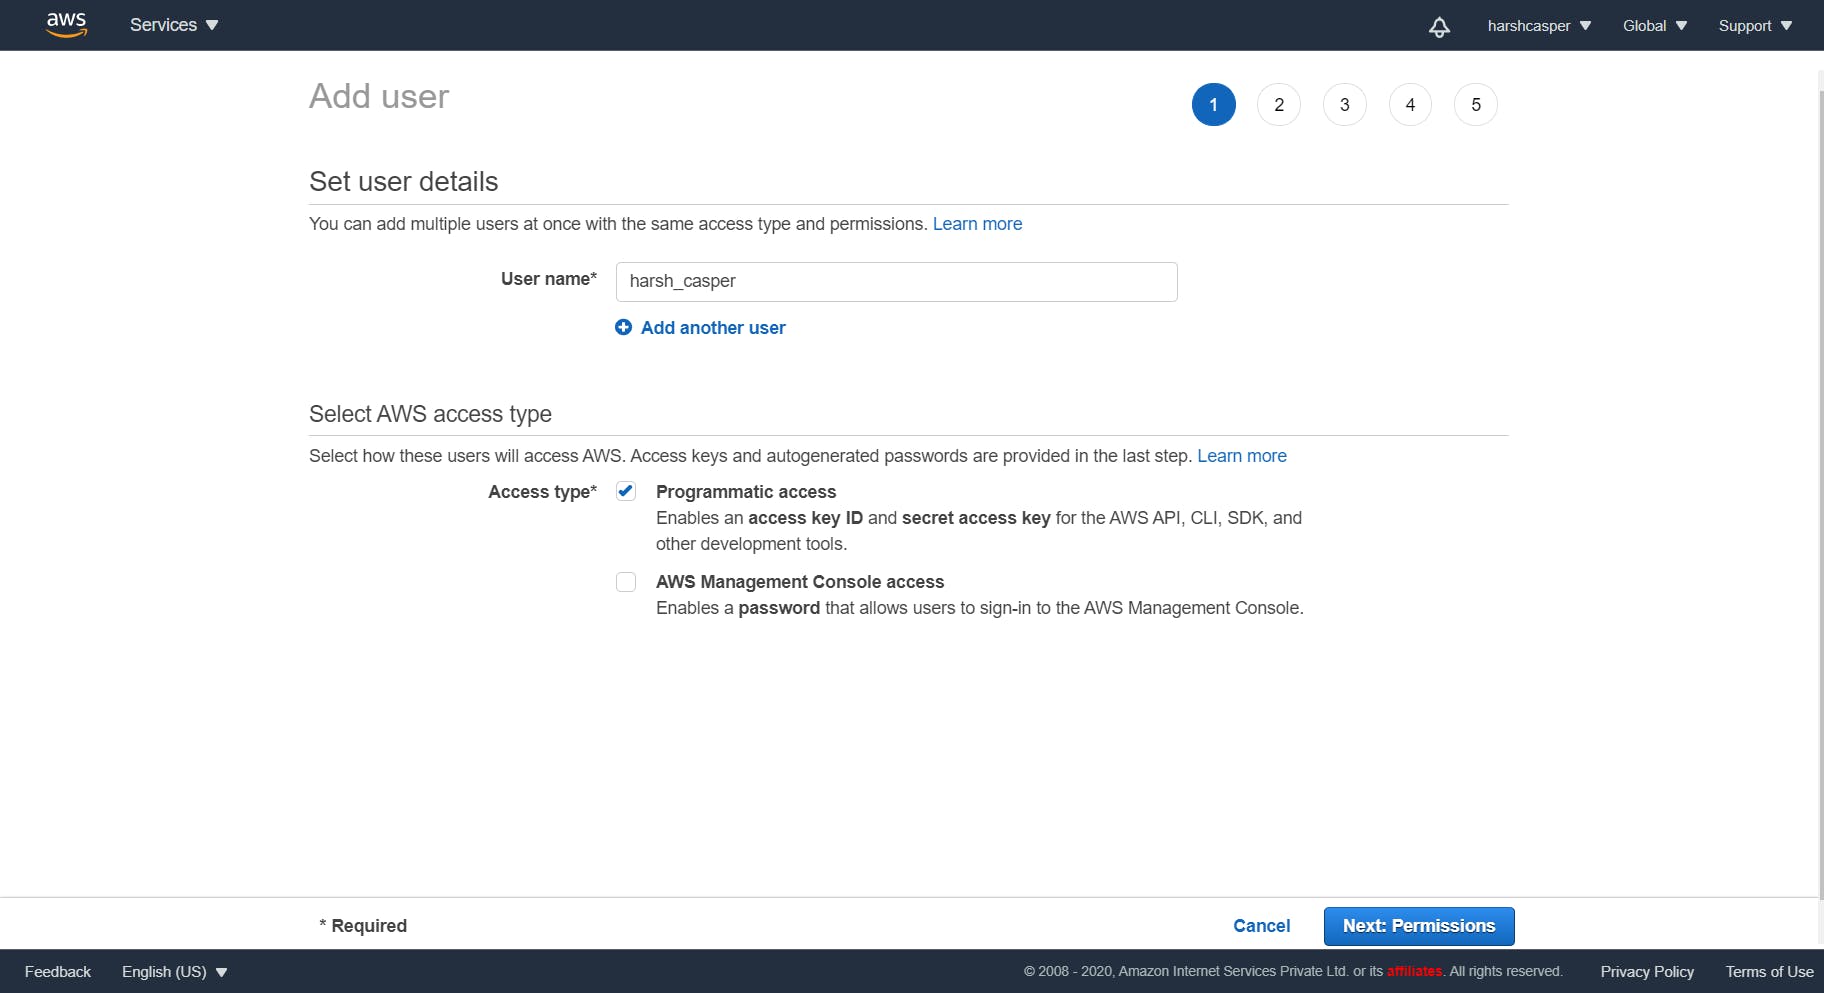
Allow Programmatic Access to enable using Access Key ID and a Secret Access Key for your purpose. Click on Next: Permissions and enable Administrator Access, which would allow you to use all the resources and services on AWS.
Click on Next: Tags and add Key-Value Pair of your choice. Click on Next: Review and finally click on Create: User. You will now have an Access Key ID and a Secret Access Key.
Go to the Terminal and press Enter. Paste the Access Key ID and Secret Access Key and specify a Profile Name. Once everything seems fine, press Enter and now your Amplify has been configured.
Building an Authentication Module
In this section, we will add an Authentication Module for our React Application without actually needing to hard-code the User Interface. Let us install that via NPM and get started with setting the Amplify Project.
$ npm i aws-amplify @aws-amplify/ui-react
Once we install the Amplify UI Component, let's initialize the Amplify in our Project:
$ amplify init
You will now be prompted with some questions that would allow you to set Amplify for your Project. The Questions will generally revolve around the Name of the Project, Environment, Default Editor, Javascript Framework being used and more like Source Directory Path, Distribution Directory Path, Start and Build Command and finally if you want to use an AWS Profile.
For the majority of the Questions, you can press Enter as the answers would already be pre-filled. For specifying the Environment Type, you can either specify Dev or Test and for the last question, we will go with our AWS Profile and use the IAM User that we configured earlier using the amplify configure command.
Note: It is recommended to run this command from the root of your app directory
? Enter a name for the project React-Amplify-Auth
? Enter a name for the environment dev
? Choose your default editor: Visual Studio Code
? Choose the type of app that you're building javascript
Please tell us about your project
? What javascript framework are you using react
? Source Directory Path:  src
? Distribution Directory Path: build
? Build Command:  npm.cmd run-script build
? Start Command: npm.cmd run-script start
Using default provider  awscloudformation


For more information on AWS Profiles, see:
https://docs.aws.amazon.com/cli/latest/userguide/cli-configure-profiles.html

? Do you want to use an AWS profile? (Y/n) (node:17500) ExperimentalWarning: The fs.promises API is experimental
? Do you want to use an AWS profile? Yes
Once the Amplify has been successfully initialized, let's move next on adding the Authentication Module to our Project:
$ amplify add auth
Now you will be asked a couple of more questions, on whether you would like to go with Default Authentication and Security Configuration, including the options through which the User will be able to Sign-In. You can go with the default options for this Article. Once the Authentication has finished, you can move next with setting the Cognito User-Pool in your Service by pushing in the Command:
$ amplify push
It will take a couple of minutes to set up the UserPool in the Cloud and deploy the same using Cloud-Formation Stack. In the next step, we will actually put the UI Module on our React Application and run the Application locally before deploying it.
Running our Application
Open the src folder and the App.js File and you can see the following block of code present there:
function App() {
  return (
    <div className="App">
      <header className="App-header">
        <img src={logo} className="App-logo" alt="logo" />
        <p>
          Edit <code>src/App.js</code> and save to reload.
        </p>
        <a
          className="App-link"
          href="https://reactjs.org"
          target="_blank"
          rel="noopener noreferrer"
        >
          Learn React
        </a>
      </header>
    </div>
  );
}
You can delete this Block of Code and add the below-mentioned Code in the place:
import React from "react";
import { withAuthenticator, AmplifySignOut } from "@aws-amplify/ui-react";

const App = () => (
  <div>
    <AmplifySignOut />
  </div>
);

export default withAuthenticator(App);
Now go to src/index.js and replace the given block of Code with this:
import React from 'react';
import ReactDOM from 'react-dom';
import './index.css';
import App from './App';
import reportWebVitals from './reportWebVitals';

import config from "./aws-exports";
import Amplify from "aws-amplify";
Amplify.configure(config);

ReactDOM.render(
  <React.StrictMode>
    <App />
  </React.StrictMode>,
  document.getElementById('root')
);

// If you want to start measuring performance in your app, pass a function
// to log results (for example: reportWebVitals(console.log))
// or send to an analytics endpoint. Learn more: https://bit.ly/CRA-vitals
reportWebVitals();
Here we have imported the Amplify Configuration and now we are ready to test our Application on the Development Server. Kick-Start the Development Server by pushing in the Command:
$ npm start
You will now see the following screen:
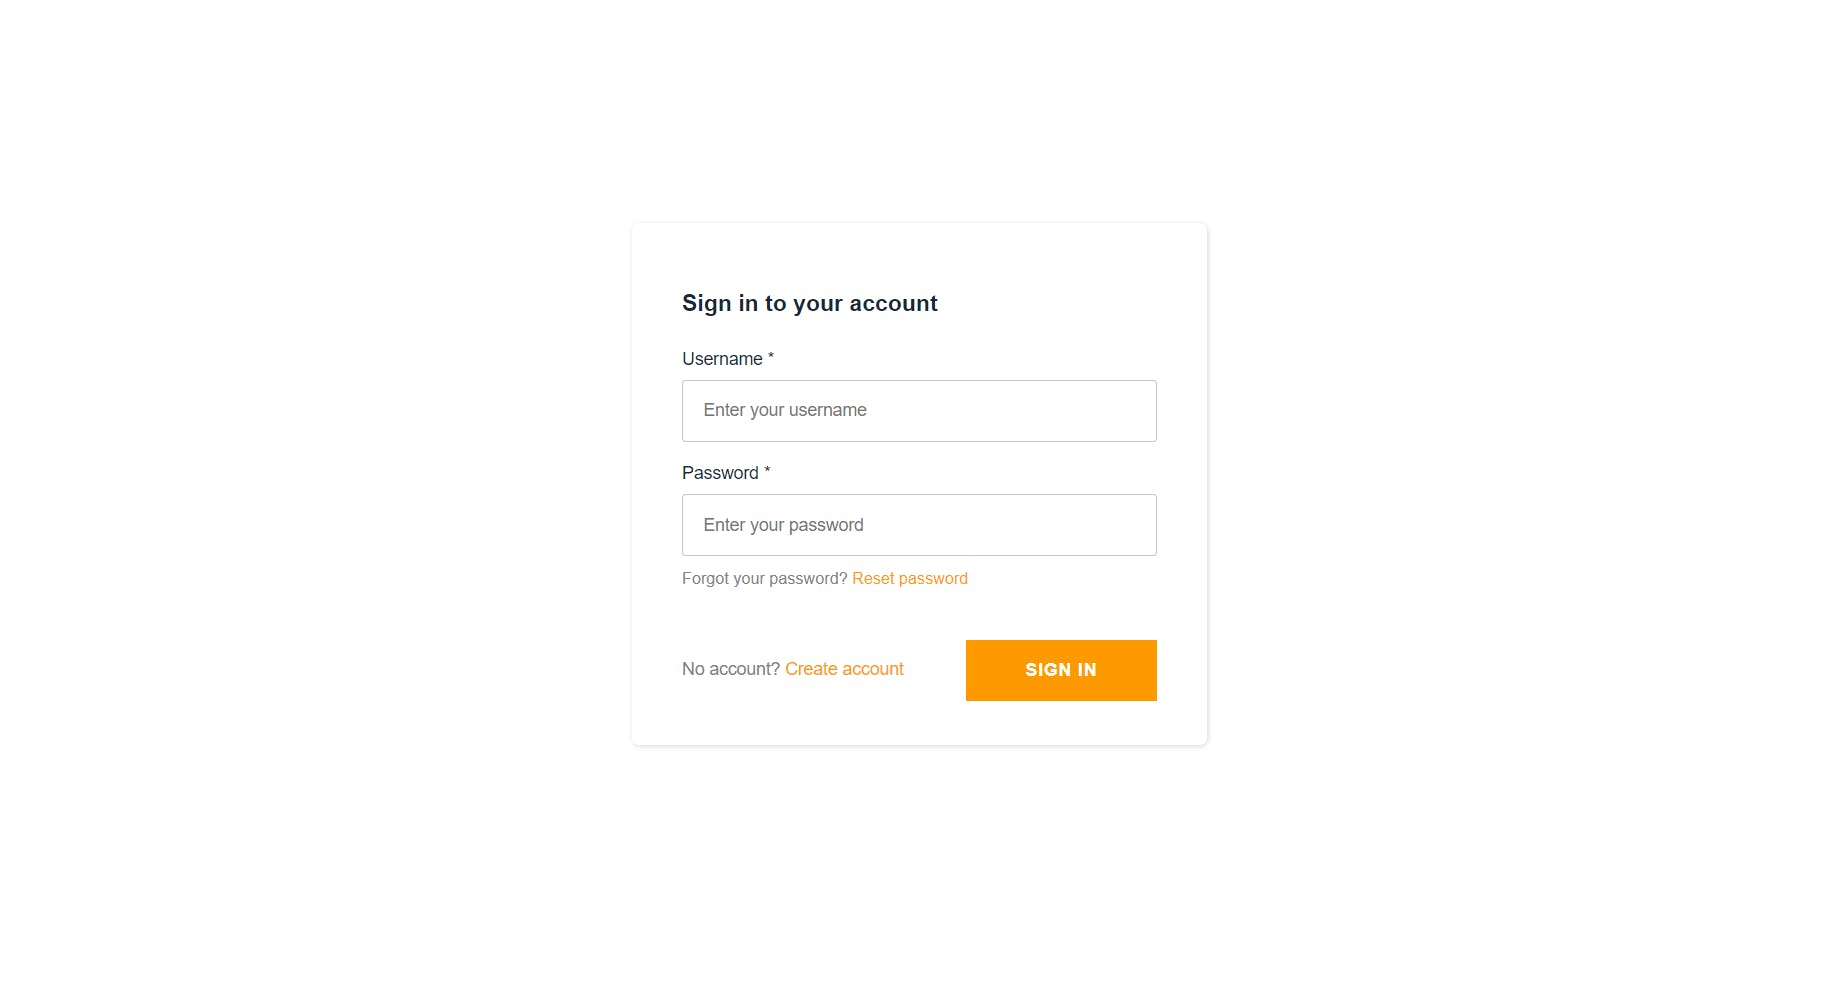
You can go for the Sign-Up Option and create an Account:
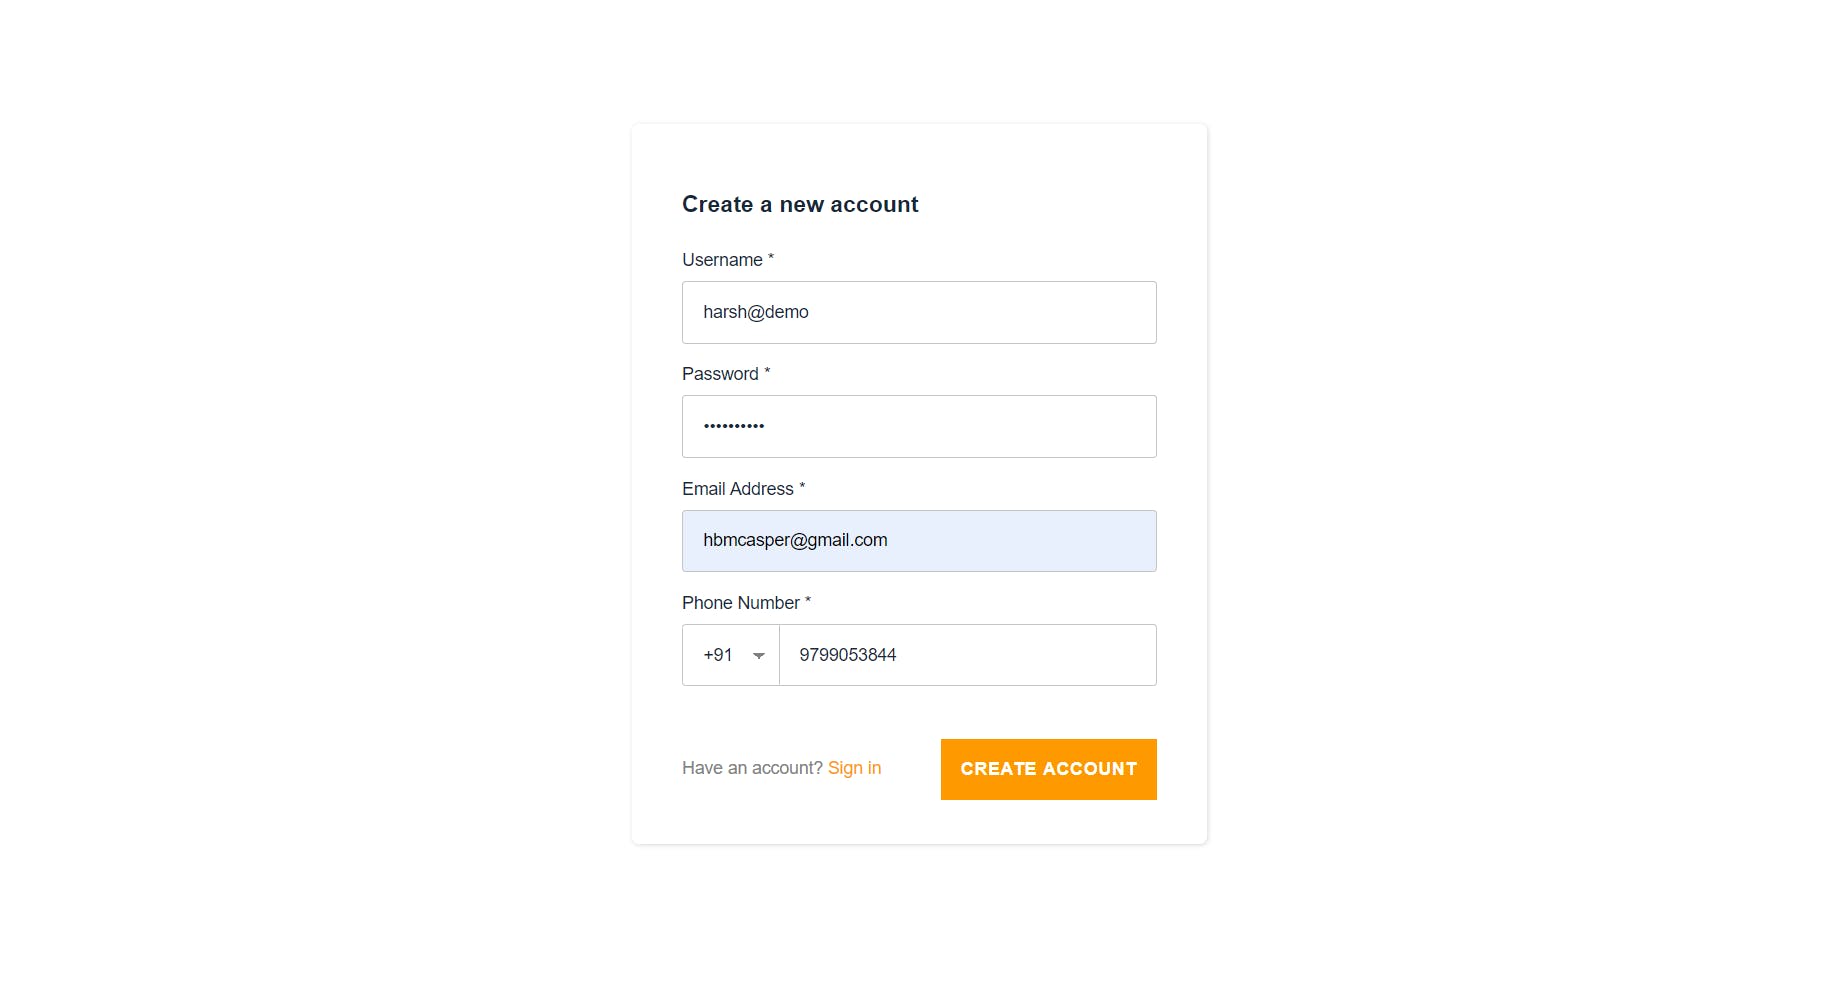
You will get a Verification Code on your E-Mail and you can use that to authenticate into your Application. You will have just a basic Landing Page with no Content and a Sign-Out Option at the top bar. Congratulations! You have made it so far. Let's go ahead and deploy our Application by setting the CI/CD Pipelines for the same.
Deploying our Application
Let us now add our Project on Github first. Create a New Repository and get the Git URL through which we will add the Remote Repository. Switch to your Terminal and push the Commands:
$ git remote add origin <YOUR_GIT_REPOSITORY>
$ git remote -v
This will add a Remote Repository to your Git and check if that Remote has been added properly or not. Move all the Files to the Staging area and make a Commit and finally push the same on your Github Repository:
$ git add .
$ git commit -m "Feature: Made an Auth App using React and Amplify"
$ git push
Once you have done that, move next to your AWS Console and visit the Amplify Service. You can already see that there is a Backend Service deployed on Amplify for us. We now need to connect our Frontend with the same.
Click on All Apps and you can see various Apps that you can use to deploy your Frontend Service with Amplify. Click on Github and add follow the next steps to authenticate your Amplify with your Github.
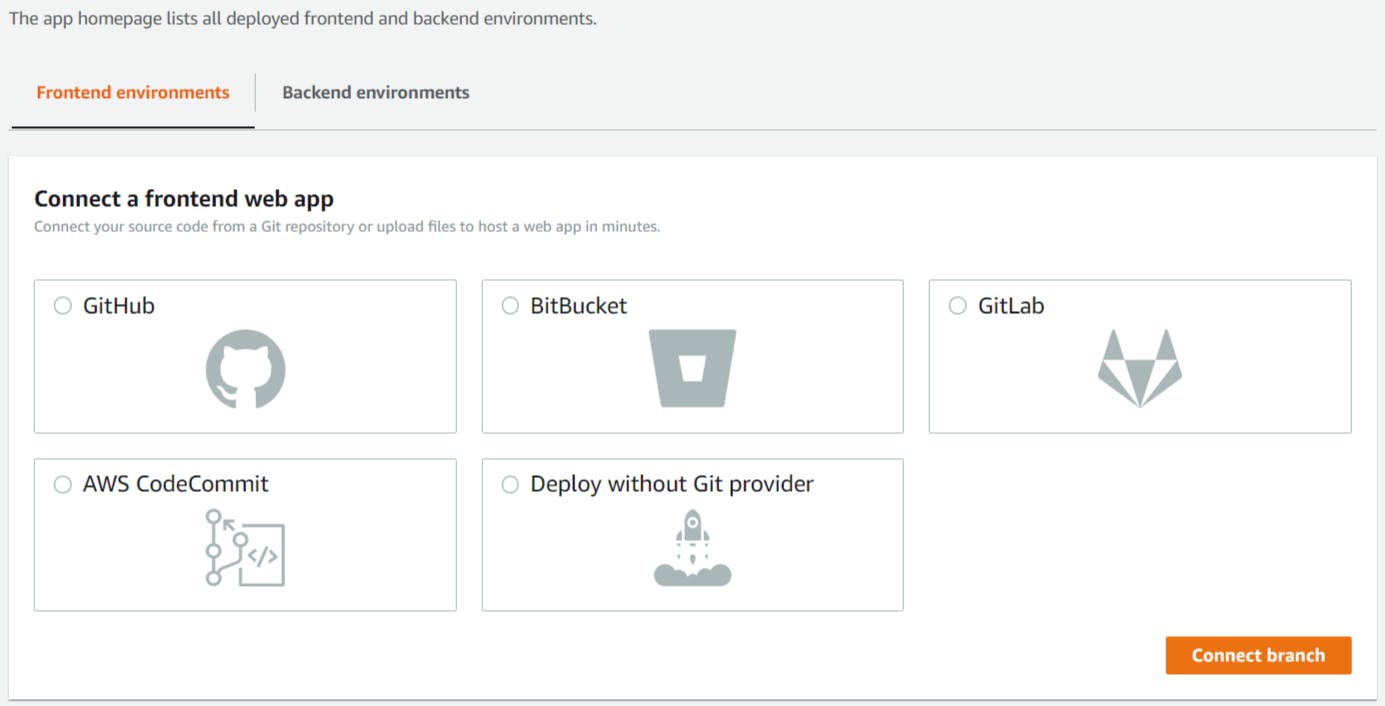
Once Github has been authenticated, choose the Repository from the Drop-Down and select the Branch that you would like to deploy. Click on Next and Save and Deploy. Amplify will now start deploying your Application which would take a couple of minutes to achieve:
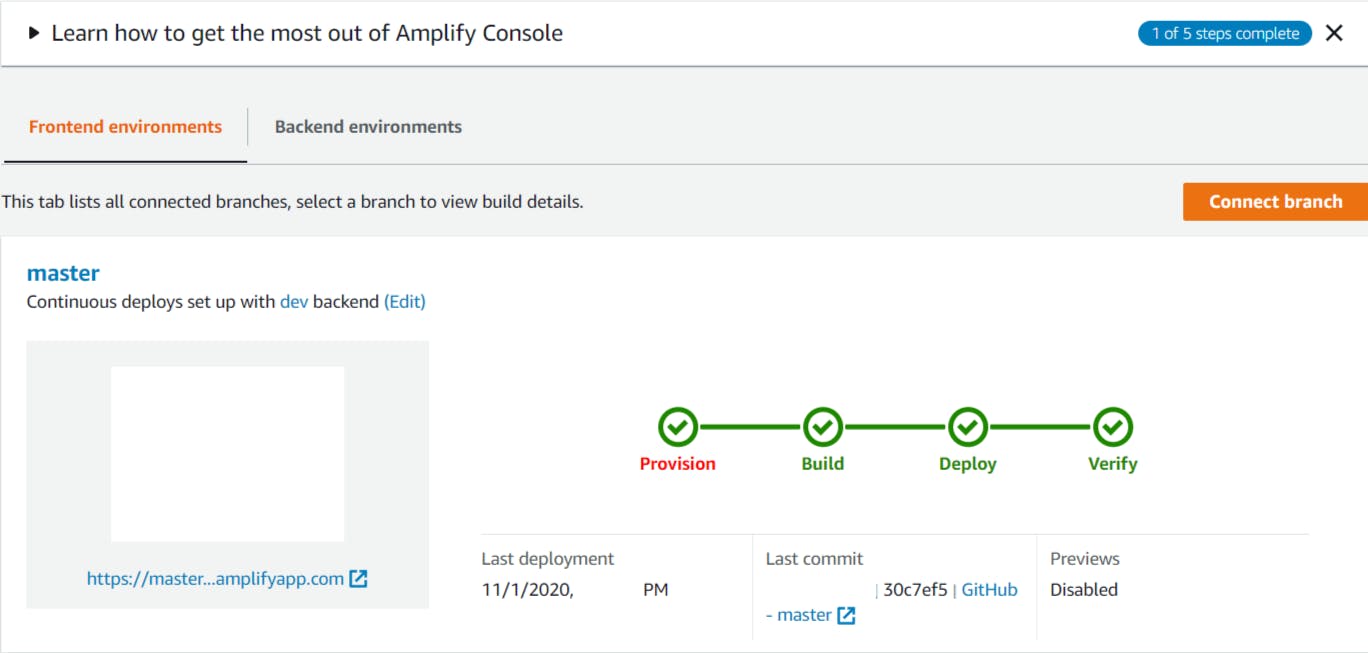
Amplify will follow a Four-Tier Process to build and deploy your App: Provision, Build, Deploy and finally Verify. Once all the steps are completed, you will finally have a deployed version of your App.
Now you have a CI/CD Pipeline setup for your purpose: Every time you make a Commit, the Amplify Dashboard would pick it up, and build your Application back from scratch and deploy it to the Server back again. This will further save your pain from re-deploying your Application manually everytime you make a change.
Conclusion
In this article we covered up the basics of AWS Amplify Service and how we can integrate the same with our React Application and deploy it using the Amplify Service along with setting a CI/CD tooling to continuously integrate and deploy your application via Amplify Console.
In the future Articles, I will be covering on how you can leverage other Amplify Services to integrate them with your Web Application. We will also be going into depth of a variety of AWS Resources and Tools which we can possibly make use to add new features in our Application and further enhance the User as well as the Developer Experience.
Find the Code for the Project on my Github Repository.